Tutorials
In this section you will find snipets of code to integrate API calls to your page
Postman
Postman is a fantastic software that lets us run requests against our APIs.
One of the many great tools of Postman are collections, sets of grouped requests that can be exported/imported, in order to be run all together for testing purposes.
Postman collection
First, download the collections we have created on the folder miscelanea/postman
You will see 2 diferent files: collections and enviroment. Download both, as we will explain later what are enviroments for.
On Postman, click on “Import” , and then select Import file.
After doing so, on the left pannel you should see the collection you just imported, as shown in the image
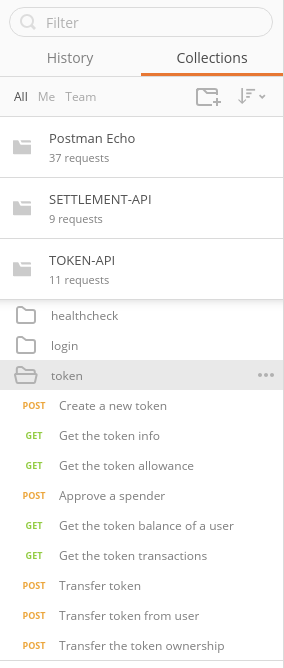
Now that we can see the collection, lets take alook at the URL for which the request is being made:
We can see that the URL contains: ” {{url}} “
This is a variable in POSTMAN. The nice things about using variables, is that we can change the endpoints of the APIs without having to modify the requests, but only the enviroment file, where the enviroment variables are specified.
To load a specific enviroment file, click the configuration button, manage enviroment, and select the enviroment file you want to load.

Great! Now, by clicking on the eye, you can watch the actual values of the enviroment values
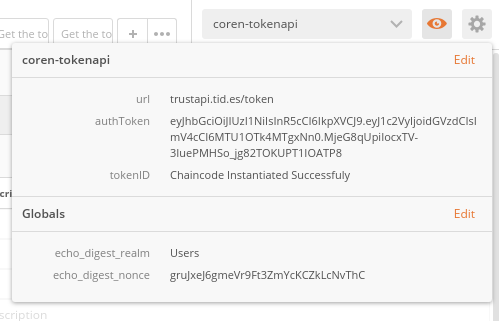
Side note Why do we say “actual values”? Because values can change dinamically
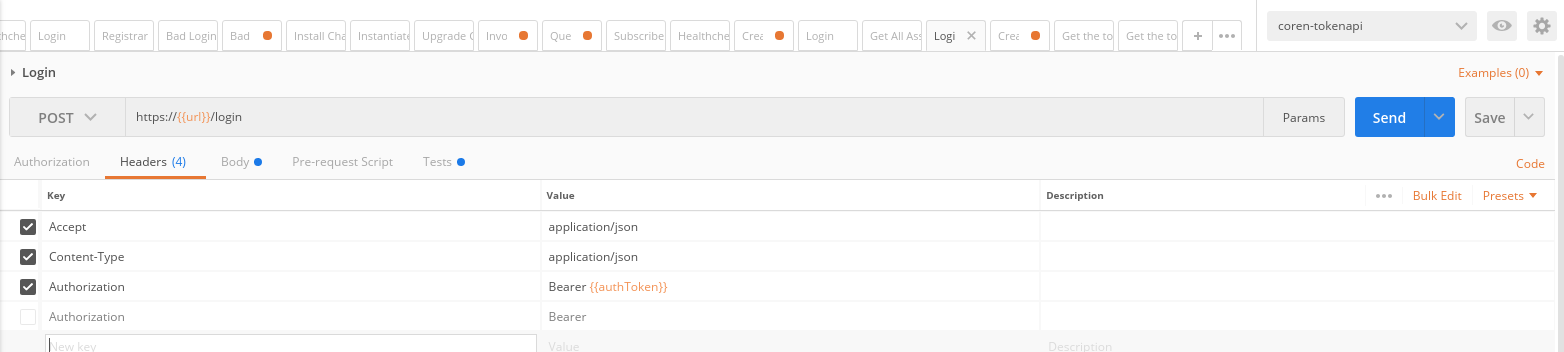
We can see that under the URL field there are some others others.
Concretely, pre-reqest scripts are scripts that execute right before the query is made, where tests are scripts that execute after the request is made.
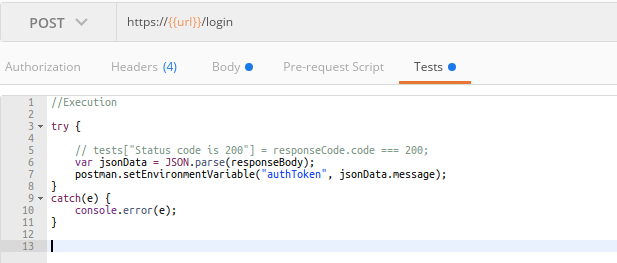
Luckily you dont have to worry about this, since we have already taken care of it. When you execute the login request, the Auth token received is set as the value of the variable “AuthToken”, which is later used in the Header tab (as can be seen in the second image of this tutorial)
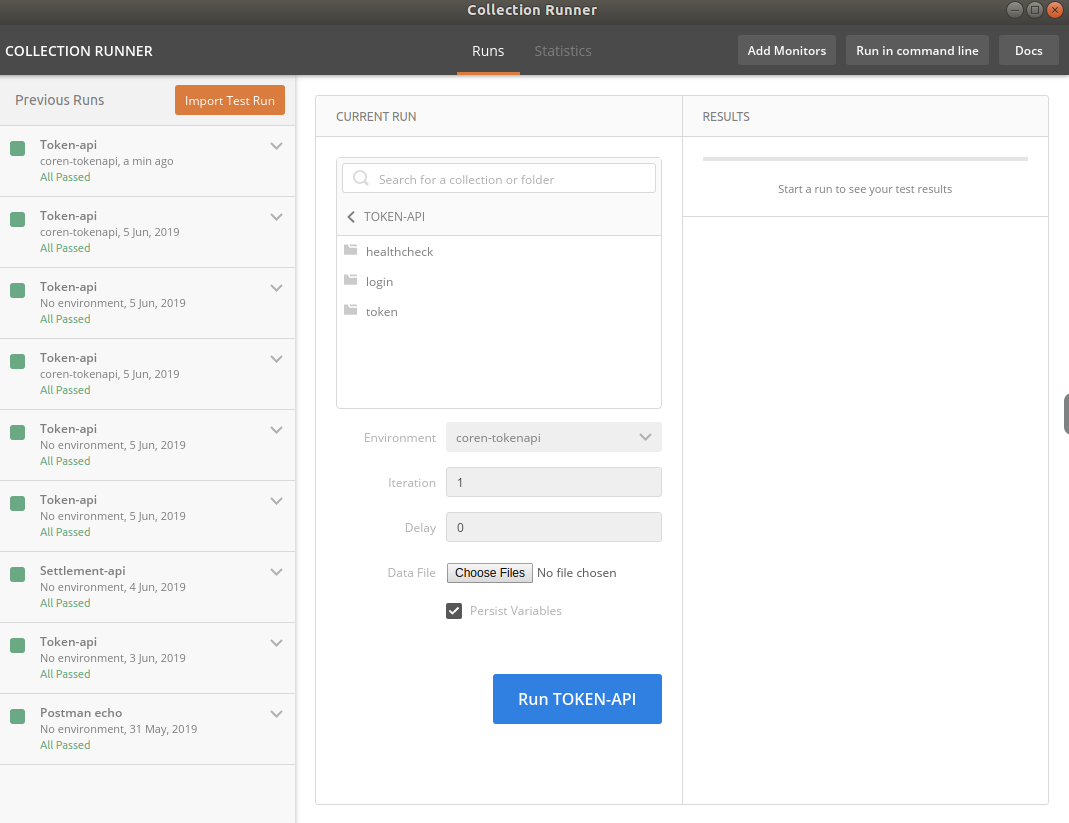
- Finally, now that we have everything set up, click on the “Runner” tab on the top left of the screen. Select the collection you want to run, the enviroment file you want to use for this collection, and run the tests!
Managing requests
NodeJS
Axios library
Axios is a promise based HTTP client for the browser. Using promises is great when dealing with code that requres chains of events.
const axios = require('axios');

axios.post('https://trustapi.tid.es/trust/asset', {
 headers: {
   Authorization: 'Bearer ' + token // Token is a variable that stores the JWT
},
  body: {
    'input':'whatever'
  })

  .then(response => {
    console.log(response.data.url);
    console.log(response.data.explanation);
  })
  .catch(error => {
    console.log(error);
  });
HTTP
If you dont want to use third party libraries,you can use node http standard module. However, this option is a little more verbose than the preceding one
const https = require('https')

const data = JSON.stringify({
  input: 'whatever'
})

const options = {
  hostname: 'https://trustapi.tid.es/',

  path: '/trust/asset/create',
  method: 'POST',
  headers: {
    'Content-Type': 'application/json',
    'Content-Length': data.length,
    'Authorization': 'Bearer '+token  // Where token is the JWT
  }
}

const req = https.request(options, (res) => {
  console.log(`statusCode: ${res.statusCode}`)

  res.on('data', (d) => {
    process.stdout.write(d)
  })
})

req.on('error', (error) => {
  console.error(error)
})

req.write(data)
req.end()
Python
Requests
You dont really want to use any other module!
import requests

auth_token='kbkcmbkcmbkcbc9ic9vixc9vixc9v'
hed = {'Authorization': 'Bearer ' + auth_token}
data = {'app' : 'aaaaa'}

url = 'https://trustapi.tid.es/trust/asset'
response = requests.post(url, json=data, headers=hed)
print(response)
print(response.json())
Shell
Lets not forget our old friend curl. This way can also be integrated in any other programming language calling something like exec.shell(command)
curl -X POST "https://trustapi.tid.es/trust/asset/create" -H "accept: application/json" -H "Authorization: Bearer eyJhbGciOiJIUzI1NiIsInR5cCI6IkpXVCJ9.eyJ1c2VyIjoidGVzdCIsImV4cCI6MTU2MTEyMjMwOX0.Qu28A580dTOXPAX9bKsnEuHRk8NxFLGL0iPkK5RuOKg" -H "Content-Type: application/json" -d "{ \"assetid\": \"1\", \"data\": {}, \"metadata\": {}, \"registerInEthereum\": \"true/false\"}"